我想要说
终于学习到了安卓的组件部分了,今天学习了 TextView 组件。而且,TextView 是所有的后面学习到的组件的父类,比如 Button、EditText 等等的父类就是 TextView。因此我们可以定制属于自己的组件。而 TextView 的父类是 View 类。
本次学习了给 TextView 中添加图片,并设置其图片的大小。还有中划线,下划线,跑马灯以及通过使用 html 代码的方式对其设置中划线和下划线。
后面学习到 Button 等这些组件的时候再说。
属性介绍
这里介绍了一些学习中使用到的属性,到时候还会继续添加并完善。
共有属性
| 属性名 | 属性描述 |
|---|---|
| focusable | 设置允许为焦点 |
| focusableInTouchMode | 设置在触摸的时候允许焦点 |
TextView 的属性
| 属性名 | 属性描述 |
|---|---|
| text | 设置文字的内容 |
| textSize | 设置文字大小,单位为 sp |
| textColor | 设置文字颜色 |
| drawableXXX | 设置嵌入图片的位置,XXX 为 Start、End、Left、Right、Bottom、Top |
| drawablePadding | 设置嵌入图片与文字之间的边距,单位为 dp |
| maxLines | 设置显示的最大行数,无单位 |
| singleLine | 只显示单行,已弃用,值为 true 或 false。推荐设置为 maxLines=1。 |
| ellipsize | 添加省略号,添加的位置为 start(在前面显示)、middle(在中间显示)、end(在末尾显示)、marquee(跑马灯) |
| marqueeRepeatLimit | 设置跑马灯重复限制,这个属性只有在设置跑马灯时才会有效果,若要无限,则使用 marquee_forever |
实例
以下实例展示了这些属性的使用
实例1,显示普通文本
<?xml version="1.0" encoding="utf-8"?>
<LinearLayout xmlns:android="http://schemas.android.com/apk/res/android"
    xmlns:app="http://schemas.android.com/apk/res-auto"
    xmlns:tools="http://schemas.android.com/tools"
    android:layout_width="match_parent"
    android:layout_height="match_parent"
    android:orientation="vertical"
    android:padding="10dp"
    tools:context="top.bestguo.androidlayout.TextviewActivity">

    <!-- 常规设置 -->
    <TextView
        android:layout_width="match_parent"
        android:layout_height="30dp"
        android:textSize="20sp"
        android:textColor="#000000"
        android:text="Hello,我是BestGuo"/>

</LinearLayout>
效果如下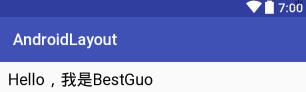
实例2,省略号
当 TextView 的文字内容不够展示的时候,这个时候需要用省略号来展示。
设置省略号的属性为 android:ellipsize,本实例中设置的省略号是在末尾。
<?xml version="1.0" encoding="utf-8"?>
<LinearLayout xmlns:android="http://schemas.android.com/apk/res/android"
    xmlns:app="http://schemas.android.com/apk/res-auto"
    xmlns:tools="http://schemas.android.com/tools"
    android:layout_width="match_parent"
    android:layout_height="match_parent"
    android:orientation="vertical"
    android:padding="10dp"
    tools:context="top.bestguo.androidlayout.TextviewActivity">

    <!-- 设置超出部分不显示 -->
    <TextView
        android:id="@+id/textView2"
        android:layout_width="110dp"
        android:layout_height="40dp"
        android:maxLines="1"
        android:ellipsize="end"
        android:textSize="20sp"
        android:textColor="#000"
        android:text="Hello,我是BestGuo"/>

</LinearLayout>
效果如下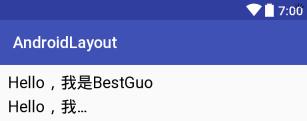
实例3,带图标的文字
当 TextView 需要添加图片的时候,此时需要添加一个图片进去。
本实例中,设置的图片位置是在文字的右边。用到的属性是 drawableRight。
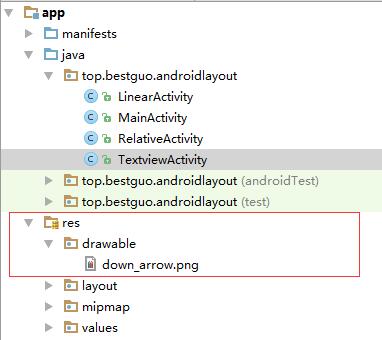
但是,需要放置的图片位置是放在 res 目录下的 drawable 目录下。这里不考虑各种机型适配的问题,先暂时这么放吧。
<?xml version="1.0" encoding="utf-8"?>
<LinearLayout xmlns:android="http://schemas.android.com/apk/res/android"
xmlns:app="http://schemas.android.com/apk/res-auto"
xmlns:tools="http://schemas.android.com/tools"
android:layout_width="match_parent"
android:layout_height="match_parent"
android:orientation="vertical"
android:padding="10dp"
tools:context="top.bestguo.androidlayout.TextviewActivity">
<!--
设置带图标的文字。
如果需要设置带图标,则需要设置一下 drawable。
但是,由于某些图片太大,需要使用到 java 代码。
-->
<TextView
android:id="@+id/textView3"
android:layout_width="65dp"
android:layout_height="40dp"
android:textSize="20dp"
android:textColor="#000"
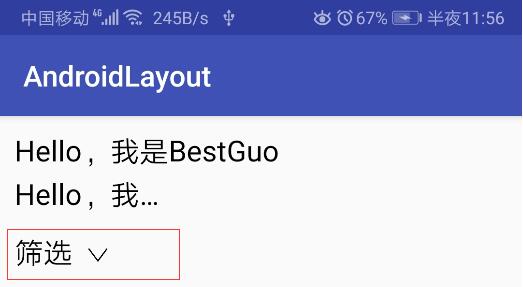
android:text="筛选"
android:drawableRight="@drawable/down_arrow"
android:drawablePadding="10dp"/>
</LinearLayout>设置的效果如下(画红色圈圈部分)
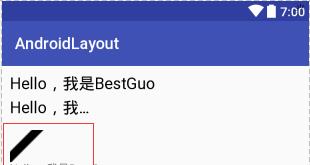
但是发现,图片实在是太大了。这张图片的源大小为 200 × 200 ,所以一整个都是图片。如果说要将图片的大小调整的话,那么就有两种方法。
- 通过使用图形编辑工具,将图片缩小。
- 通过 java 代码的方式来调整。
这里使用 Java 代码来调整。
使用的 Java 代码
package top.bestguo.androidlayout;

import android.graphics.Paint;
import android.graphics.drawable.Drawable;
import android.support.v7.app.AppCompatActivity;
import android.os.Bundle;
import android.widget.TextView;

public class TextviewActivity extends AppCompatActivity {

    TextView tv3;

    @Override
    protected void onCreate(Bundle savedInstanceState) {
        super.onCreate(savedInstanceState);
        setContentView(R.layout.activity_textview);
        tv3 = (TextView) findViewById(R.id.textView3);
        // 获取 TextView 中的图片
        Drawable dw = tv3.getResources().getDrawable(R.drawable.down_arrow);
        dw.setBounds(0, -15, 45, 45); // 前两个属性是设置图片的位置,后两个属性是设置图片的宽和高
        // 设置图片是在文字的哪个位置:左、上、右、下。这里是设置在右边
        // 如果还需要在 TextView 中设置几个图片,可以一起设置
        tv3.setCompoundDrawables(null, null, dw, null);
    }
}
效果如下
通过使用 Java 代码进行改进,可以达到我们想要的效果了。
实例4,带中划线和带下划线的文字
带中划线和带下划线的文字,不能直接在 xml 文件中来直接编辑。只能通过 Java 代码来实现除这种效果。
同时,以下示例展示了使用两种方式来给文本添加下划线。
<?xml version="1.0" encoding="utf-8"?>
<LinearLayout xmlns:android="http://schemas.android.com/apk/res/android"
    xmlns:app="http://schemas.android.com/apk/res-auto"
    xmlns:tools="http://schemas.android.com/tools"
    android:layout_width="match_parent"
    android:layout_height="match_parent"
    android:orientation="vertical"
    android:padding="10dp"
    tools:context="top.bestguo.androidlayout.TextviewActivity">
    <!--
        设置中划线,中划线和下划线需要通过 Java 代码来实现。
    -->
    <TextView
        android:id="@+id/textView4"
        android:layout_width="wrap_content"
        android:layout_height="wrap_content"
        android:text="Hello,我是BestGuo"/>

    <!--
        设置下划线,中划线和下划线需要通过 Java 代码来实现。
    -->
    <TextView
        android:id="@+id/textView5"
        android:layout_width="wrap_content"
        android:layout_height="wrap_content"
        android:text="Hello,我是BestGuo"/>

    <!--
        设置下划线,通过 html 代码
    -->
    <TextView
        android:id="@+id/textView6"
        android:layout_width="wrap_content"
        android:layout_height="wrap_content"
        android:text="Hello,我是BestGuo"/>

</LinearLayout>
java 代码
package top.bestguo.androidlayout;

import android.graphics.Paint;
import android.graphics.drawable.Drawable;
import android.support.v7.app.AppCompatActivity;
import android.os.Bundle;
import android.text.Html;
import android.widget.TextView;

public class TextviewActivity extends AppCompatActivity {

    TextView tv4, tv5, tv6;

    @Override
    protected void onCreate(Bundle savedInstanceState) {
        super.onCreate(savedInstanceState);
        setContentView(R.layout.activity_textview);

        // 设置中划线的代码
        tv4 = (TextView) findViewById(R.id.textView4);
        tv4.getPaint().setFlags(Paint.STRIKE_THRU_TEXT_FLAG); // 设置中划线

        // 设置下划线的代码
        tv5 = (TextView) findViewById(R.id.textView5);
        tv5.getPaint().setFlags(Paint.UNDERLINE_TEXT_FLAG); // 设置下划线

        // 设置下划线的代码,使用 Html 的方式
        tv6 = (TextView) findViewById(R.id.textView6);
        tv6.setText(Html.fromHtml("<u>Hello,我是BestGuo</u>"));

    }
}
效果如下
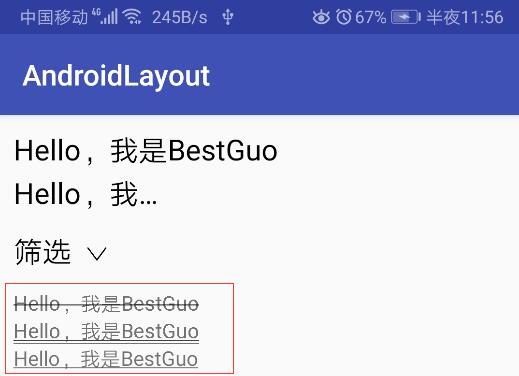
不懂为什么,我的华为 p10 在显示下划线效果时会出现双下划线。不懂为什么😨😨😨
实例5,跑马灯
在做跑马灯的时候,太坑了。
因为设置跑马灯的效果时,它的属性必须设置成 singleLine,而不是 maxLine
<?xml version="1.0" encoding="utf-8"?>
<LinearLayout xmlns:android="http://schemas.android.com/apk/res/android"
xmlns:app="http://schemas.android.com/apk/res-auto"
xmlns:tools="http://schemas.android.com/tools"
android:layout_width="match_parent"
android:layout_height="match_parent"
android:orientation="vertical"
android:padding="10dp"
tools:context="top.bestguo.androidlayout.TextviewActivity">
<!--
设置跑马灯。
注意:设置跑马灯的效果时必须设置成 singleLine,而不是 maxLine
-->
<TextView
android:layout_width="wrap_content"
android:layout_height="wrap_content"
android:singleLine="true"
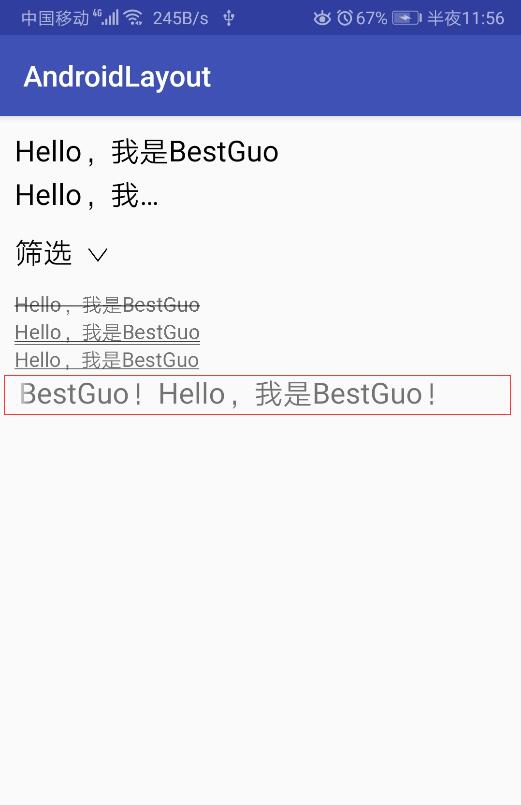
android:text="Hello,我是BestGuo!Hello,我是BestGuo!Hello,我是BestGuo!"
android:textSize="20sp"
android:marqueeRepeatLimit="marquee_forever"
android:focusable="true"
android:ellipsize="marquee"
android:focusableInTouchMode="true"/>
</LinearLayout>效果如下(红色圈出部分)
内容补充
在设置 layout_width 和 layout_height 的时候值为 wrap_content。这个值的意思就是随着元素内部的变化而自动适应。
请勿发布违反中国大陆地区法律的言论,请勿人身攻击、谩骂、侮辱和煽动式的语言。